A fitting can look tight, feel tight and still leave a tell-tale wet patch underneath by morning. That is usually not bad luck – it is the wrong sealing method, incompatible materials, damaged threads or one turn too many. This guide to sealing threaded joints covers the practical decisions that prevent leaks in water, fuel, rainwater and workshop pipework without turning a simple job into a mess.
Start by identifying what actually seals
The first rule is simple: not every threaded fitting seals on its threads. Some threads pull two faces together, while a washer, O-ring or cone makes the seal. Others use tapered threads that are designed to wedge together and need a suitable thread sealant to fill the microscopic gaps.
Confusing these two arrangements causes plenty of frustration. If a fitting seals on a flat face with a rubber washer, wrapping tape around the thread may do nothing useful. Worse, too much tape can stop the fitting reaching the correct seating position. If it is a tapered threaded joint, relying on brute force alone can crack a plastic port, distort a brass fitting or leave a slow seepage path.
In practical fluid-handling work, you will commonly come across BSP threads in the UK. BSPT is tapered and commonly sealed on the thread. BSPP is parallel and generally seals with a washer, bonded seal, O-ring or a purpose-made face seal. NPT is another tapered thread type, often found on imported equipment, but it has a different thread angle and pitch to BSP. Do not assume that two fittings that almost start together are a proper match.
Check the fitting before choosing a sealant
Look for a shoulder, recessed O-ring groove, cone or flat sealing face. These point to a face-sealed connection. A visibly tapered male thread entering a female threaded port is more likely to need thread tape or liquid sealant.
Also check the thread condition. Flattened first threads, old tape packed into the root of the thread, cross-threading and dirt from a workshop floor can defeat the best sealant. Clean both sides with a lint-free cloth, remove old material fully and inspect the plastic or metal for hairline cracks. A cracked IBC outlet, hose tail or adaptor will not be cured with another wrap of tape.
Choose the right way to seal threaded joints
There is no single best sealant. The correct choice depends on the thread style, the liquid being handled, temperature, vibration and whether you may need to undo the fitting later.
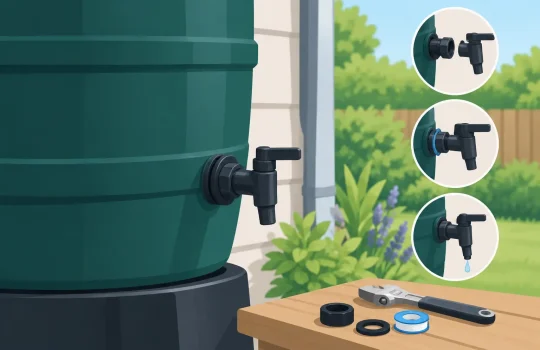
PTFE tape is clean, inexpensive and effective on many tapered threads. It suits water systems and can work well for compatible fuel applications when applied properly. Tape is particularly useful where a fitting needs to be positioned correctly, such as a tap, elbow or hose outlet, because it adds lubrication while filling small gaps.
Thread sealant paste is often the better workshop choice for metal tapered threads, especially where joints may see vibration or repeated temperature changes. It fills threads more consistently than poorly applied tape and is less likely to shred. The trade-off is cure time on some products, more cleaning during disassembly, and the need to verify chemical compatibility.
Anaerobic thread sealants are made for close-fitting metal threads. They cure in the absence of air between metal surfaces and can offer an excellent seal, but they are not a universal answer. They are usually unsuitable for many plastics and should only be used where the manufacturer confirms compatibility with the fluid and fitting material.
For parallel BSP fittings, use the seal the fitting was designed for: a new washer, bonded seal or correctly sized O-ring. A bonded seal combines a metal ring with a rubber insert and is common on ports and adaptors. It needs a clean, flat sealing face. Reusing a compressed washer might work once, but it is false economy on a fitting that is awkward to reach or carries valuable liquid.
When handling diesel, biodiesel blends, oils, potable water or rainwater, check the seal material as well as the sealant. Some rubbers swell or soften in fuel. Some pastes are not rated for drinking water. A fitting that does not leak on day one can fail after weeks of exposure if the gasket or sealant is wrong for the job.
How to apply PTFE tape properly
Most tape failures come from application, not the tape itself. The tape needs to sit in the thread roots and tighten with the fitting, rather than unravel as the fitting goes in.
Hold the male fitting with its threaded end facing you. Start one thread back from the end so no loose tape is pushed into the fluid path. Wrap in the same direction the fitting will turn when tightened – usually clockwise when viewed from the end. Keep slight tension on the tape and press it into the thread as you go.
For a typical small-to-medium tapered thread, use several neat wraps rather than a thick wad. The exact number depends on tape thickness and thread size, so follow the tape supplier’s guidance. The objective is even coverage, not bulk. Finish by smoothing the tail into the thread so it cannot peel off.
Avoid covering the very first thread. Loose pieces of PTFE can end up in a valve, filter, pump or small outlet. On rainwater harvesting and transfer systems, that can mean a blocked mesh, poor flow or contamination exactly where you were trying to keep things clean.
Do not use tape to force a bad fit
If the fitting only engages by a turn or two, stops abruptly, or begins at an angle, take it apart. Clean it and confirm the thread type and size. Adding more tape to mismatched or damaged threads only hides the problem until pressure, movement or time exposes it.
Plastic female ports deserve extra care. PTFE tape reduces friction, which makes it easy to overtighten a male fitting before you notice. Tighten by hand first, then use a tool only as needed. If the fitting reaches its final position but is still weeping, remove it, inspect it and reseal it rather than leaning harder on the spanner.
Tightening: firm is useful, forced is expensive
Threads need enough engagement to seal, but excessive torque is one of the most common causes of leaks. It can split polypropylene fittings, strip plastic threads, deform washers and make future maintenance unnecessarily difficult.
Start every connection by hand. It should turn smoothly for several turns. Once resistance builds, tighten steadily with an appropriate spanner, keeping the fitting supported so you are not twisting a hose, tank outlet or filter housing. For fittings with a washer or O-ring, stop once the seal is compressed and the joint is secure. More force does not make a flat-face seal more watertight.
Orientation matters too. A hose tail needs to point where the hose can run without kinking; a tap needs to finish upright. With thread-sealed tapered fittings, use the chosen sealant to achieve the final position, not repeated loosening and retightening. If you overshoot badly, take it apart and start again. Backing off a tapered thread can compromise the seal.
Test before you trust the joint
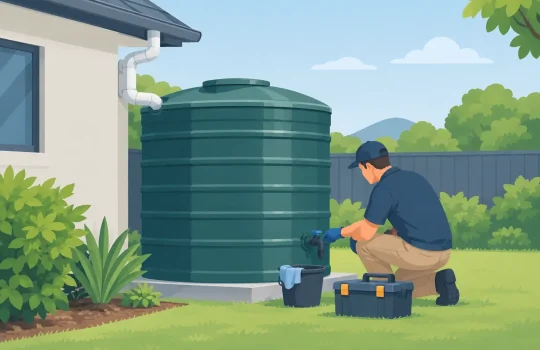
A dry visual check is not enough. Fill or pressurise the system gradually and inspect every connection under good light. Wipe the joint dry first, then look again after a few minutes. A tissue around the fitting makes a small weep easier to spot than a glance at a shiny brass adaptor.
For fuel transfer equipment, keep ignition sources well away and test with care. For water systems, leave the joint under normal operating conditions long enough to reveal a slow leak. Vibration, hose movement and temperature changes can expose a marginal seal that looked fine during the first five minutes.
If a joint leaks, do not simply tighten it until something gives. Depressurise and drain the system where necessary, then identify the cause. It may be the wrong seal type, poor tape direction, a damaged washer, a cracked component or a thread mismatch. Fixing the actual fault is quicker than rebuilding a puddle-prone fitting every few weeks.
A practical checklist for common fittings
Before assembling a threaded joint, confirm these four points:
- The threads are the same standard, size and type.
- The fitting seals on its threads or on a washer, O-ring or face.
- The sealant and seal material suit the liquid, temperature and fitting material.
- The joint is clean, hand-started, correctly aligned and tested after assembly.
This is the sort of detail that saves time, fluid and the irritation of finding a leak after everything has been put away. TMI Shop is built around solving those hands-on problems properly: use the fitting as intended, use the right seal for the job, and a clean transfer setup stays clean.