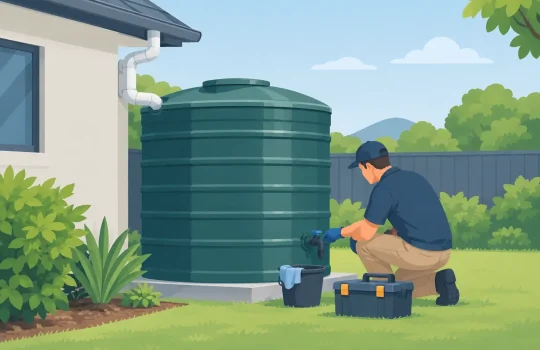
A water butt is only useful if you can get the water out without balancing a watering can under a dribble or mopping up a leak afterwards. Knowing how to fit a water butt tap properly means choosing the right height, using both seals correctly and tightening the fitting enough to seal – but not so hard that you damage the plastic.
Most water butt taps are simple threaded fittings. The job is well within reach of a practical DIYer, and usually takes less than half an hour. The details matter, though. A poorly positioned tap leaves litres trapped in the base, while a missing washer can turn a useful rainwater store into a permanently muddy patch.
What you need before fitting a water butt tap
Start with a tap kit that suits the wall thickness and hole size of your butt. A typical kit includes a threaded tap body, one or two rubber washers and a backing nut. Some taps have a short threaded shank; others are longer to suit thicker moulded plastic. Do not assume every tap fits every butt simply because the outlet looks similar.
You will normally need a drill, a hole saw or stepped drill bit matched to the tap’s shank, a marker pen, a tape measure and an adjustable spanner. A round file or sharp craft knife is useful for removing burrs after drilling. Have a cloth handy too – clean, dry plastic gives the washers their best chance of sealing.
If the butt has a factory-marked outlet, inspect it before drilling. The marked circle is often the right size and height, but check it against the tap fitting rather than taking it on trust. Inventor-led practical design starts with measuring the part in your hand, not guessing from the moulding.
Choose the tap position before making the hole
Fit the tap as low as practical, but not right on the bottom. Leave enough clearance beneath it to get a watering can, bucket or hose connector in place. On many butts, 75 to 100 mm above the base works well, although the shape of the butt and the tap handle can alter this.
There is a trade-off. A very low tap lets you use more of the stored water, but it may sit below the lip of your watering can or too close to the stand. A higher tap is easier to use but leaves more water behind. If you are putting the butt on blocks or a purpose-made stand, work out the final height first. A tap fitted before the stand arrives can end up awkwardly close to the ground.
Avoid curved corners, ribs, seams and heavily textured areas. The washers need a reasonably flat surface to make an even seal. Choose a smooth section of wall and ensure there is enough room inside for the backing nut to turn.
Check clearance inside and out
Look through the filler opening before drilling. Some water butts have moulded strengthening sections or awkward internal shapes near the base. You need access to hold and tighten the internal nut. On the outside, make sure the tap handle can rotate freely and is not blocked by a wall, fence or downpipe.
How to fit a water butt tap step by step
Empty and dry the water butt before starting. Trying to fit a tap to a full butt is a quick way to create a large, uncontrolled leak. Place it on a stable, level surface where you can reach both sides of the wall.
Mark the centre of the hole. If you are drilling a new outlet, use the threaded section of the tap as your guide. The hole should be large enough for the threaded shank to pass through without force, but not so large that the washer has little plastic left to grip.
Drill slowly. A hole saw gives the neatest result in most plastic water butts, while a stepped bit is useful if you need to creep up to the correct size. Support the area with your free hand where possible, use light pressure and let the tool cut rather than forcing it. Excess heat can soften thin plastic and leave a ragged hole.
Once drilled, remove all burrs from both sides. Even a small sharp ridge can prevent a rubber washer sitting flat. Wipe away plastic swarf and make sure the contact area is dry.
The usual fitting order is straightforward: place a rubber washer over the threaded shank on the outside of the butt, push the tap through the hole, then fit the second washer and nut from inside. However, tap kits vary. If the instructions supplied with your fitting show a different arrangement, follow those instructions. The important principle is that a seal sits against the water-facing surface and the nut compresses the assembly evenly.
Hand-tighten the nut first while keeping the tap level and facing the direction you want. Then use an adjustable spanner to give it a small additional turn. Do not overtighten. Water butt plastic can flex, and crushing it around the hole can distort the surface, damage the washer or cause a crack that is far harder to fix than a simple seep.
As a practical rule, tighten until the washers are compressed and the tap no longer moves, then stop. If it leaks during testing, tighten in small increments rather than giving it a heroic final turn.
Test it before relying on it
Add a few litres of water and inspect both sides of the fitting. Run a dry finger around the outside washer and look inside the butt around the backing nut. A tiny damp patch is easier to diagnose now than once the butt is full and the rain is doing its best work.
Open and close the tap several times. Check that the flow clears the body of the butt and that a watering can sits comfortably below it. If you intend to attach a hose, make sure the outlet thread or hose tail is compatible before filling the butt to the brim.
Leave the test water in place for ten minutes. Some leaks only appear once the plastic settles under a little pressure. If the fitting stays dry, fill the butt normally and check it again after the first full load.
Why water butt taps leak – and the simple fixes
Most leaks come from one of four causes:
- The hole is too large, rough or drilled through a curved section, so the washer cannot seal evenly.
- A washer is missing, fitted on the wrong side or twisted as the nut was tightened.
- The nut is either too loose to compress the seal or too tight and has distorted the plastic wall.
- Dirt, old sealant or plastic swarf is trapped beneath the washer.
Start by draining the water level below the tap. Loosen the fitting, clean the surfaces and refit it squarely. If the original hole is too large, a wider rubber washer may rescue the job, but only if there is sound, flat plastic around it. A cracked butt or badly enlarged hole may need a purpose-made repair fitting rather than extra sealant.
Avoid using silicone as the first answer. It can make future removal messy, hides the real cause of a poor fit and often does not bond well to the plastic used in many butts. A correctly sized tap, clean washers and sensible tightening are usually all that is required.
Make the most of the water you collect
A tap can only dispense water that reaches it. Put the butt on a strong stand, blocks or a solid raised base if you need more clearance for containers. Make certain the support is level and rated for the weight involved: 200 litres of water weighs roughly 200 kg before the butt itself is counted.
Keep leaves, moss and roof grit out at the top as well. A lid filter or downpipe filter reduces sediment settling at the bottom, protects the tap from debris and gives your stored rainwater a better chance of being useful when the garden needs it. If you use the water for a hose-fed system, filtration becomes even more worthwhile.
For a clean, reliable setup, fit the tap low enough to use the water, high enough to use the container, and check the seal while the butt is only partly full. It is a small job, but getting it right saves repeated trips, wasted water and the familiar annoyance of wet shoes beside the shed.